最近知った、@lazarv/react-serverというReactフレームワークに触れてみました。
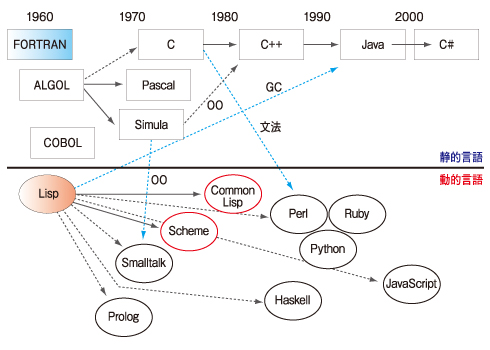
React19では、React Server CompnentやServer Functionという全く新しい機能がサポートされ、Reactを取り巻く世界が揺れだしていると感じます。その結果としてNext.js以外に多数のフレームワークが生まれてきています。
このブログでも、
を紹介してきました。 @lazarv/react-serverを含め全てのフレームワークは Viteをベースにしています、Next.js包囲網でしょうか。😁
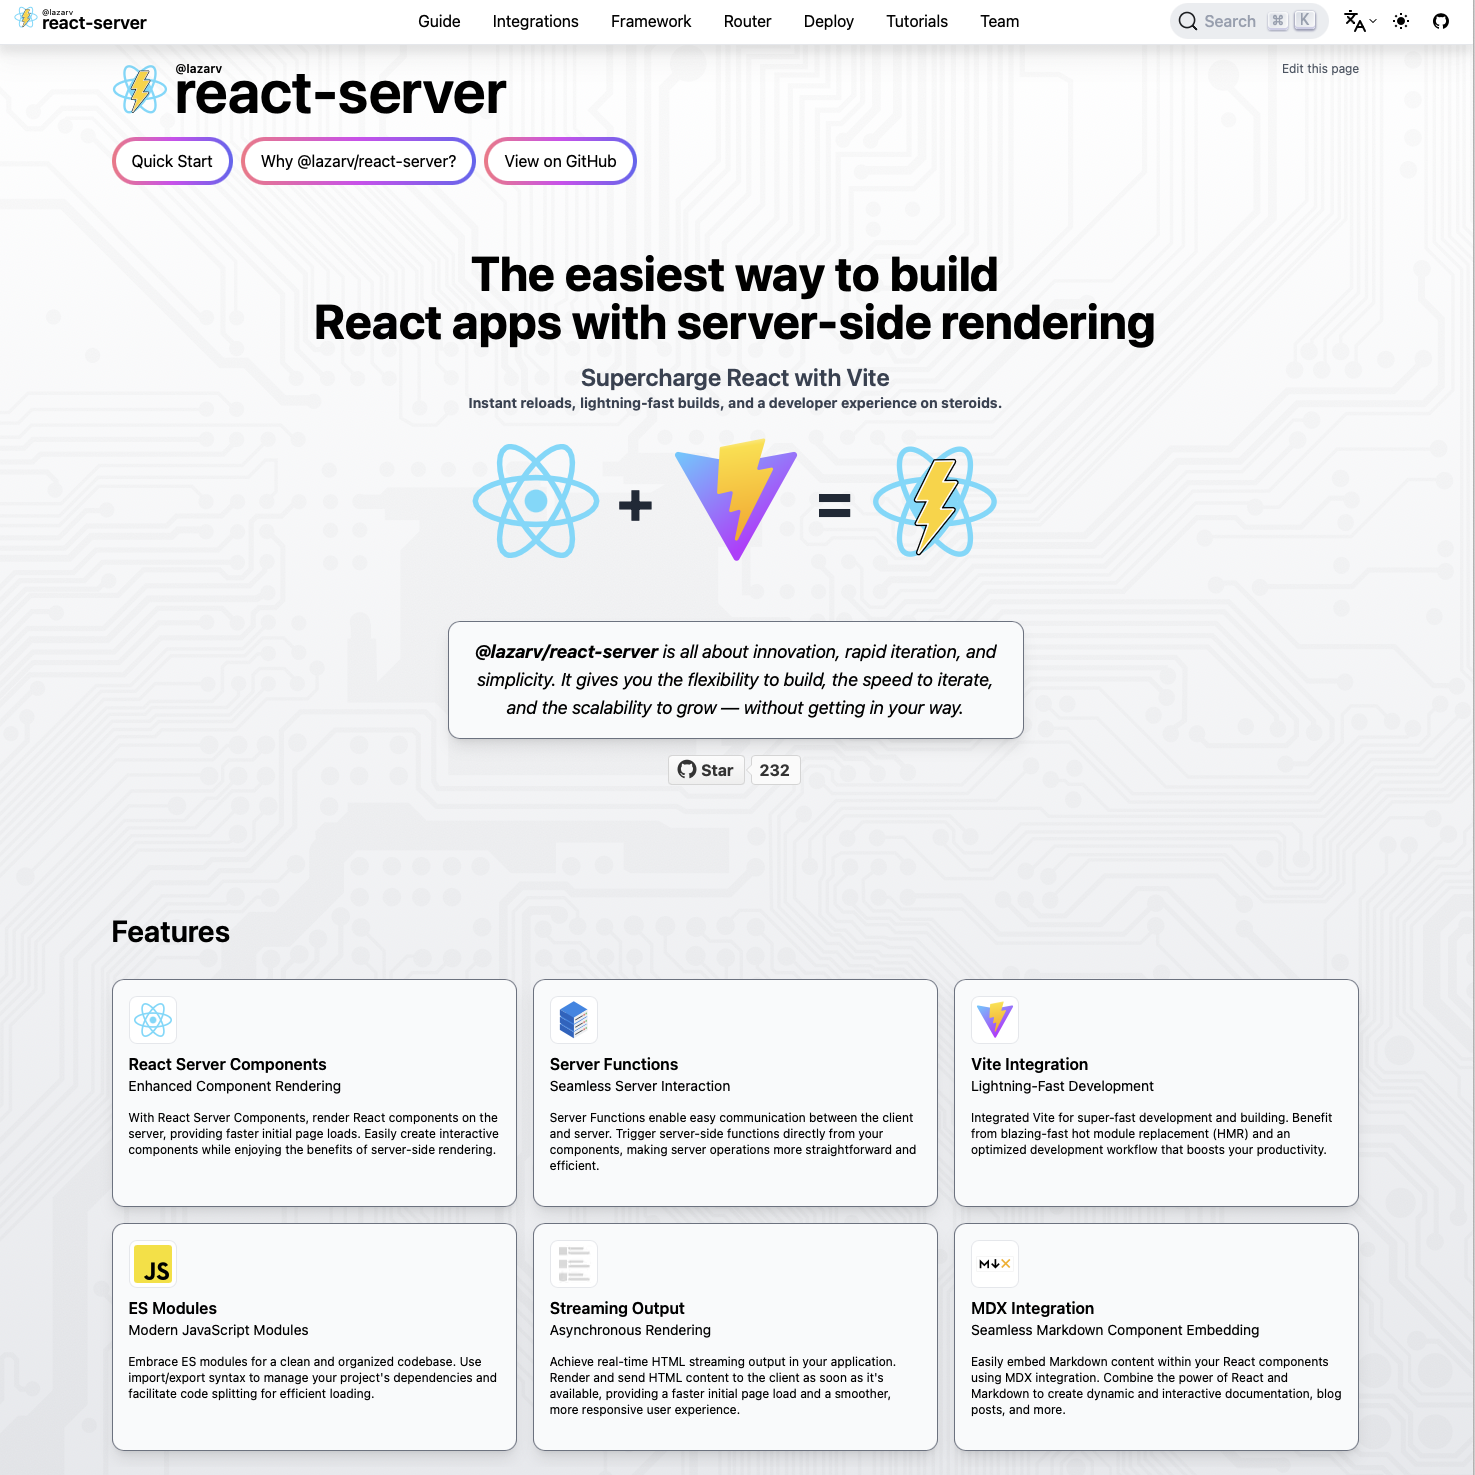 @lazarv/react-serverホームページより
@lazarv/react-server とは
@lazarv/react-serverのホームページには、 以下が特徴として取り上げられています。 しかし、これだけではReact19 + Viteのフレームワークでは当たり前のような気もします。
- React Server Compnent
- Server Function
- Vite Integration
- ES Modules
- Streaming Output
- MDX Integration
ホームページの中心に The easiest way to build React apps with server-side rendering と書かれています、これは大きな特徴かもしれません。
プロジェクト作成
いつものジャンケンアプリを作ります。
- ジャンケンの結果はサーバー側のRDB(Prisma + SQLite3)に格納します
- スタイリングは最近V4.0がリリースされたTailwind CSS
- 当然ですがTypeScriptベースです
作成手順(1)
現時点ではcreate-XXXX系のアプリは無いですが、npmプロジェクトを作りnpm install @lazarv/react-serverすれば基本は完了です。後はPrismaやTailwind CSSをインストールしています。
$ mkdir react-server-jyanken
$ cd react-server-jyanken
$ npm init -y
$ git init
$ npm install @lazarv/react-server
$ npm install -D @types/react-dom @types/react
$ npm install -D tailwindcss @tailwindcss/postcss postcss
$ npm install @prisma/client
$ npm install -D prisma
$ npx prisma init
prisma/schema.prisma
Prismaの設定とモデル(テーブル)定義
generator client {
  provider = "prisma-client-js"
}

datasource db {
  provider = "sqlite"
  url      = "file:./jyanken.db"
}

model Scores {
  id        Int      @id @default(autoincrement())
  human     Int
  computer  Int
  judgment  Int
  matchDate DateTime
}
作成手順(2)
テーブル作成(Prismaのマイグレーション)
$ npx prisma migrate dev -n create_scores
設定ファイル
今回のプロジェクトで必要になる、設定ファイルです。
package.json
scriptsの部分は、@lazarv/react-serverのTutorials→Using server functions よりコピー
{
  "name": "react-server-jyanken",
   ・・・
  "scripts": {
    "dev": "react-server ./src/index.tsx",
    "build": "react-server build ./src/index.tsx",
    "start": "react-server start"
  },
   ・・・
}
postcss.config.js
Tailwind CSSのInstallation→Using PostCSS よりコピー
module.exports = {
  plugins: {
    "@tailwindcss/postcss": {}
  },
};
tailwind.config.js
@lazarv/react-serverのIntegrations→Tailwind CSS よりコピーして、簡略化
module.exports = {
  content: ["./src/**/*.tsx"],
  theme: {
    extend: {},
  },
  plugins: [],
};
tsconfig.json
@lazarv/react-serverのIntegrations→TypeScript よりコピー
{
  "compilerOptions": {
    "strict": true,
    "module": "ESNext",
    "moduleResolution": "Bundler",
    "lib": ["ESNext", "DOM", "DOM.Iterable"],
    "jsx": "preserve",
    "types": ["react/experimental", "react-dom/experimental"],
    "allowSyntheticDefaultImports": true,
    "baseUrl": "./src",
    "paths": {
      "@/*": ["./*"]
    }
  },
  "include": ["**/*.ts", "**/*.tsx", ".react-server/**/*.ts"],
  "exclude": ["**/*.js", "**/*.mjs"]
}
作成したコード
画面はこんなイメージです。
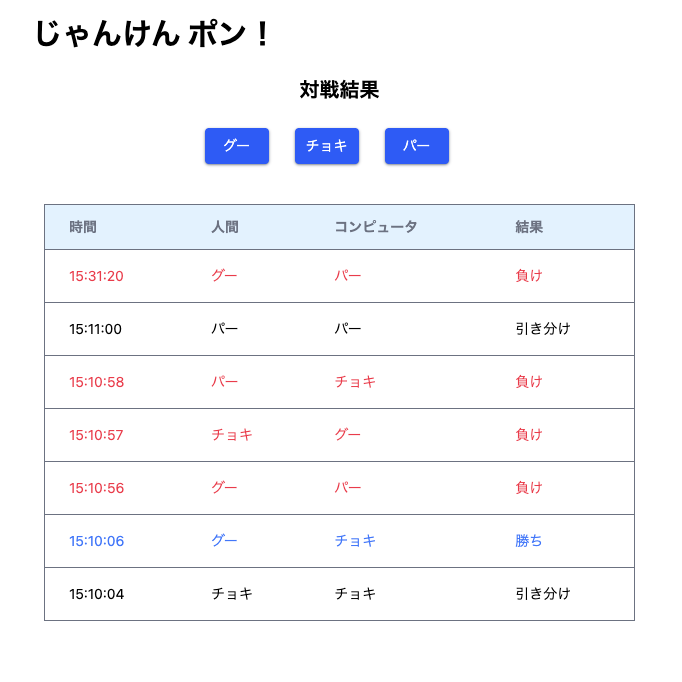
今回のコードは、全てサーバーで動作します。
src/index.tsx
メインのコンポーネント
"use server"を書いてはいけません😅。
あまり説明する事はありませんが、当然サーバーコンポーネントは非同期(async)に出来ます。
import Layout from "./Layout";
import JyankenBox from "./JyankenBox";
import ScoreList from "./ScoreList";
import { getScores } from "./jyankenFunctions";

export default async function App() {
  const scores = await getScores();

  return (
    <Layout>
      <div className="mx-8 w-1/2">
        <h1 className="my-6 text-center text-xl font-bold">
          対戦結果
        </h1>
        <JyankenBox />
        <ScoreList scores={scores} />
      </div>
    </Layout>
  )
}
src/Layout.tsx
レイアウト用のコンポーネント
import "./global.css";

export default function Layout({ children }: React.PropsWithChildren) {
  return (
    <html lang="ja">
      <head>
        <meta charSet="utf-8" />
        <meta name="viewport" content="width=device-width, initial-scale=1.0" />
        <title>ジャンケン</title>
      </head>
      <body>
        <div className="p-4">
          <h1 className="text-3xl font-bold ml-5 mb-4">
            じゃんけん ポン!
          </h1>
          {children}
        </div>
      </body>
    </html>
  );
}
src/global.css
TailWind CSSのCSSファイル、v4.0で少し変わりましたね。
@import "tailwindcss";
src/JyankenBox.tsx
ジャンケンボタンのコンポーネント
ボタン1つ毎にformを作る事で、サーバー・コンポーネントで生成されたformからのPOSTリクエストでServer Functionが実行されます。
import { Te } from "./jyanken";
import { postJyanken } from "./jyankenFunctions";

export default function JyankenBox () {

  const buttonClass = `text-white text-center text-sm rounded w-16 px-2 py-2
    bg-blue-600 hover:bg-blue-700 shadow shadow-gray-800/50`;

  return (
    <div className="w-[270px] mx-auto flex justify-center mb-10">
      <form action={postJyanken} className="flex-1">
        <input type="hidden" name="human" value={Te.Guu} />
        <button className={buttonClass}>グー</button>
      </form>

      <form action={postJyanken} className="flex-1">
        <input type="hidden" name="human" value={Te.Choki} />
        <button className={buttonClass}>チョキ</button>
      </form>

      <form action={postJyanken} className="flex-1">
        <input type="hidden" name="human" value={Te.Paa} />
        <button className={buttonClass}>パー</button>
      </form>
    </div>
  );
}
src/ScoreList.tsx
ジャンケン結果の表示コンポーネント
import { Score } from './jyanken';

const JudgmentColor = ["text-[#000]", "text-[#2979ff]", "text-[#ff1744]"];

type ScoreBoxProps = {
  scores: Score[];
}
export default function ScoreBox ({scores}: ScoreBoxProps)  {
  const header=["時間", "人間", "コンピュータ", "結果"];
  return (
    <table className="w-full text-sm text-left text-gray-500">
      <thead className="bg-sky-100 border">
        <tr>
          {header.map((title, ix) => (
            <th key={ix} scope="col" className="px-6 py-3">
              {title}
            </th>
          ))}
        </tr>
      </thead>
      <tbody className="bg-white border">
        {scores.map((score, ix) => (
          <ScoreListItem key={ix} score={score} />
        ))}
      </tbody>
    </table>
  );
}

type ScoreListItemProps = {
  score: Score;
};
function ScoreListItem({score}: ScoreListItemProps) {
  const teString = ["グー", "チョキ", "パー"];
  const judgmentString = ["引き分け", "勝ち", "負け"];
  const dateHHMMSS = (d: Date) => d.toTimeString().substring(0, 8);
  const tdClass = `px-2 md:px-6 py-4 ${JudgmentColor[score.judgment]}`;

  return (
    <tr className="bg-white border-b">
      <td className={tdClass}>{dateHHMMSS(score.matchDate)}</td>
      <td className={tdClass}>{teString[score.human]}</td>
      <td className={tdClass}>{teString[score.computer]}</td>
      <td className={tdClass}>{judgmentString[score.judgment]}</td>
    </tr>
  );
};
src/jyankenFunctions.ts
Server Functionのモジュール
ここには"use server"を書きます。getScoresは通常のPrisma実行関数です。
postJyankenはformから送られてきたデータを受け取りhumanパラメーターを取り出しジャンケンを行い、対戦結果をDBに格納します。
その後redirectで画面の再表示を行っていますが、これが無くても正しく動くようです。
"use server";

import { redirect } from "@lazarv/react-server";
import { PrismaClient } from "@prisma/client";
import { judge, randomHand, Score, Te } from "./jyanken";

const prisma = new PrismaClient();

export async function getScores() {
  const scores = await prisma.scores.findMany({orderBy: {id: 'desc'}, take: 10});
  return scores as Score[];
}

export async function postJyanken(formData: FormData) {
  const humanHand = Number(formData.get("human")?.toString() ?? "0") as Te;
  const computerHand = randomHand();
  const score: Score = {
    human: humanHand,
    computer: computerHand,
    judgment: judge(humanHand, computerHand),
    matchDate: new Date()
  };
  await prisma.scores.create({ data: score });
  redirect('/');
}
src/jyanken.ts
ジャンケンに関する型や関数のモジュール
export const Te = {
  Guu: 0,
  Choki: 1,
  Paa: 2
} as const;
export const Judgment = {
  Draw: 0,
  Win: 1,
  Lose: 2
} as const;

export type Te = (typeof Te)[keyof typeof Te];
export type Judgment = (typeof Judgment)[keyof typeof Judgment];

export type Score = {
  human: Te;
  computer: Te;
  judgment: Judgment;
  matchDate: Date;
};

export type Status = {
  draw: number,
  win: number,
  lose: number
}

export const randomHand = (): Te => {
  return Math.floor(Math.random() * 3) as Te;
}

export const judge = (humanHand: Te, computerHand: Te): Judgment => {
  return (computerHand - humanHand + 3) % 3 as Judgment;
}

export const calcStatus = (scores: Score[]): Status => {
  const jugdeCount = (judge: Judgment) =>
    scores.reduce((count, score) => score.judgment === judge ? count + 1 : count, 0);
  return {
    draw: jugdeCount(Judgment.Draw),
    win:  jugdeCount(Judgment.Win),
    lose: jugdeCount(Judgment.Lose)
  };
}
感想
Next.jsのように書いて行くと、謎なエラーが発生し苦労しました。まだ新しいフレームワークなのでネット上には(英語を含め)情報が少なく、問題が解決せずに時間を浪費してしまいました。
今回のコードは @lazarv/react-serverのtodo-appサンプルコードを参考にすることでやっと動きました。
動くようになってみると、Viteの快適なReact開発環境が出来ていると感じました。The easiest way to build React apps with server-side rendering ですね。
今回のコードは、まるで従来のバックエンドで動くWebアプリのような全てサーバー・コンポーネントでした。しかし、クライアント・コンポーネントも組み合わせられるはずなので、次回はクライアント・コンポーネントを含めたコードを書いてみたいと思います。