Reactのフレームワークとして人気のあったRemixの最新バージョンReact Router v7が正式リリースされました❗❓
以前のBlog RemixはReact界のRuby on Railsか? でRemixを取り上げましたが、最新版が出たので試してみました。
 Rimix Blog “React Router v7” より
React Router と Remix
Reactに詳しくない方向けに、簡単にReact Router と Remix を説明します。
- React Routerは10年以上前からあるReact用ライブラリーで、URLと表示されるコンポーネントを関連付けする人気ライブラリーです
- RemixはRemixはReact界のRuby on Railsか?で書いたようにバックエンドを含むReactのフルスタック・フレームワークです。開発チームはReact Routerと同じです
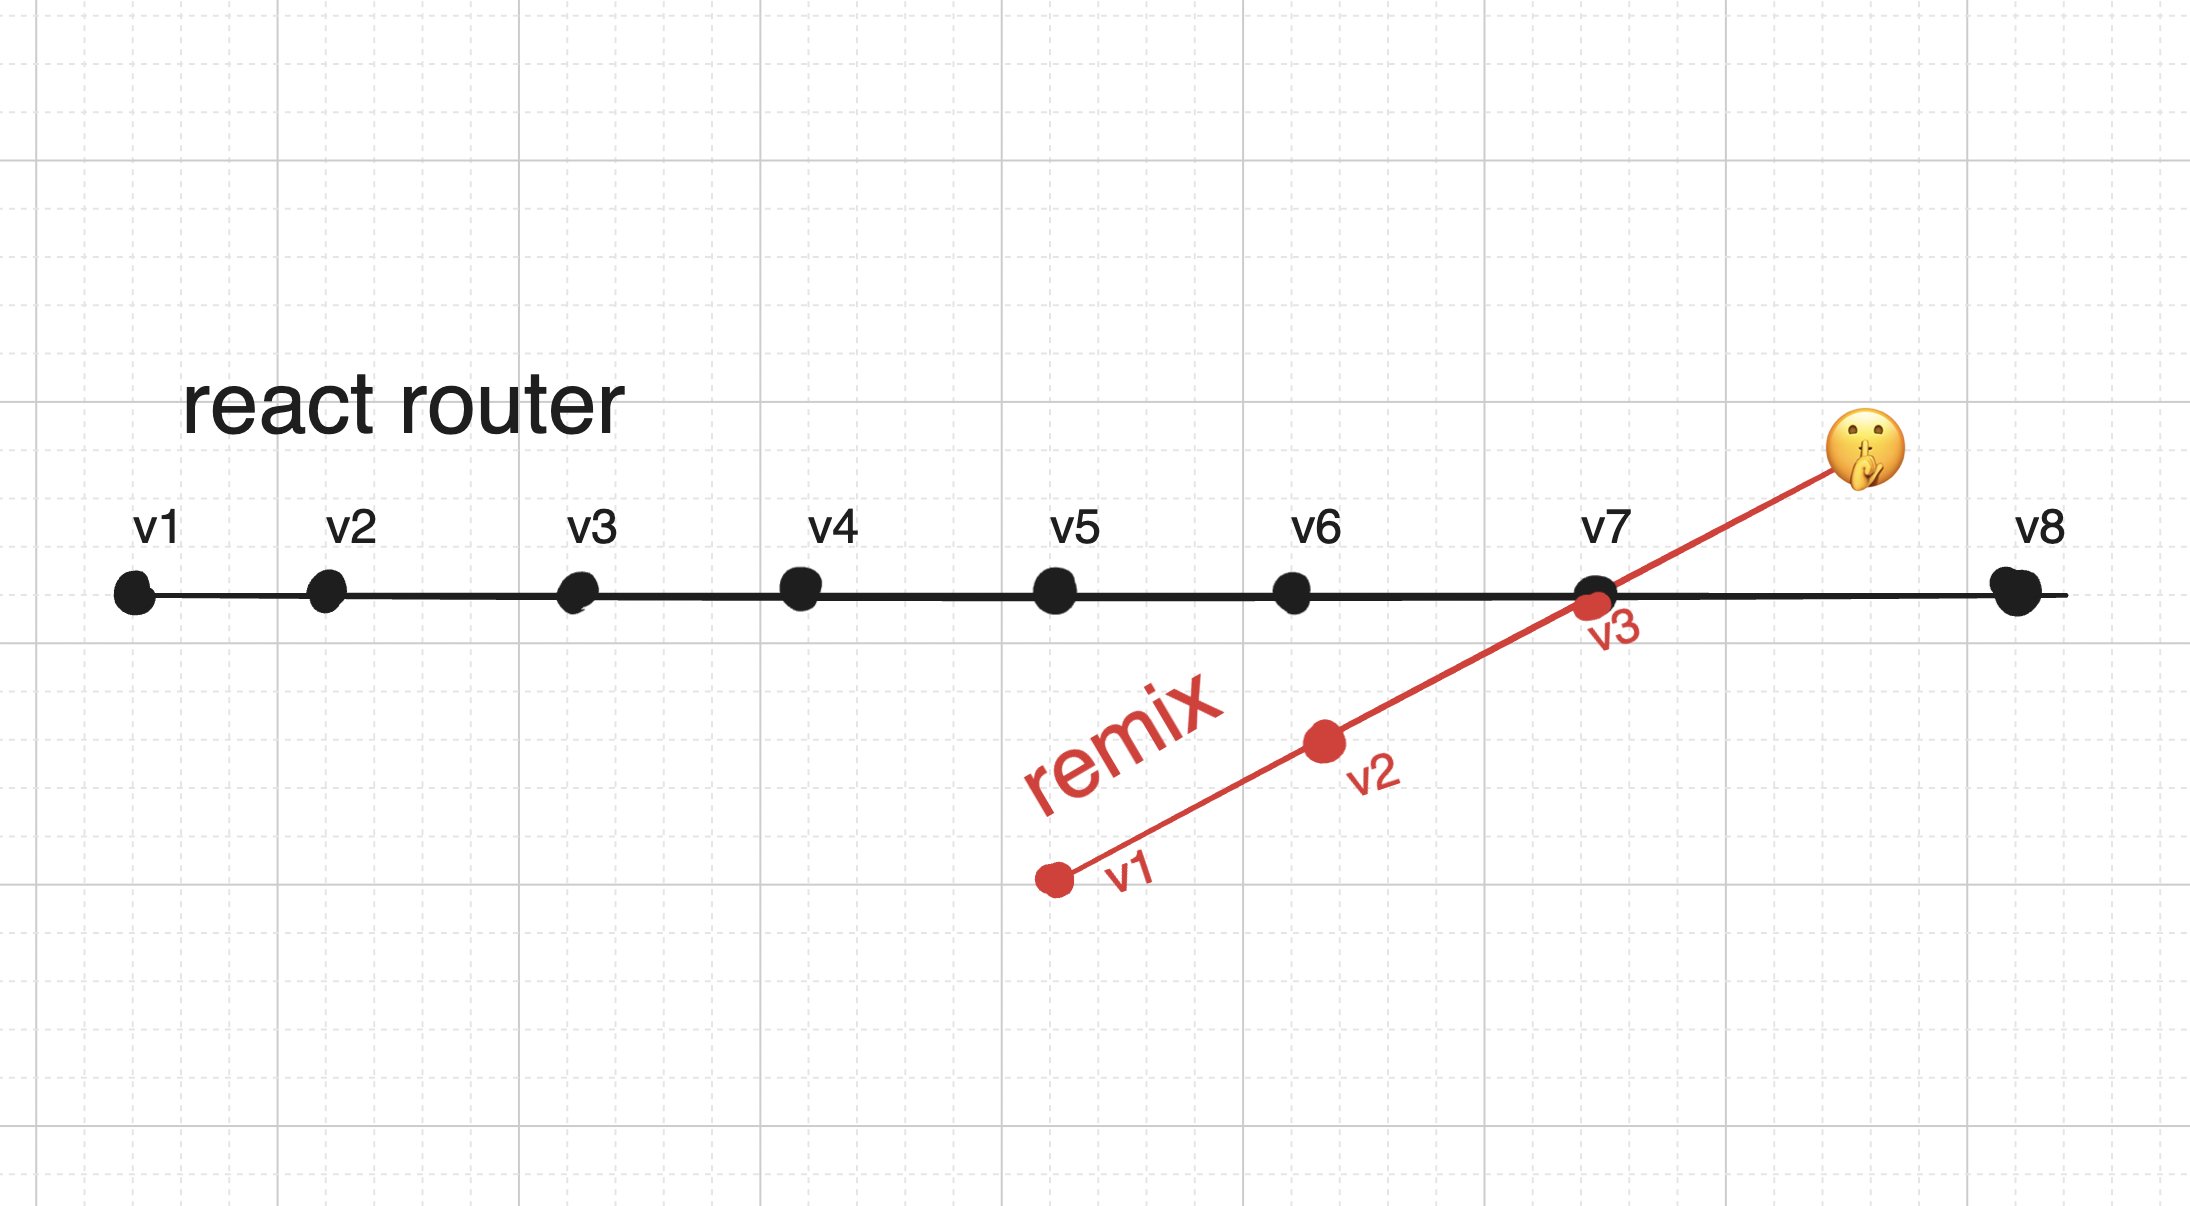
しかし、React 19がServer Functions (少し前まではServer Actionsと呼ばれていました)をサポートしたことで、Remixの存在意義が薄れてしまいました。そこで、今年5月にRemix開発チームはMerging Remix and React Routerブログを書き、以下の図のようにRemixの機能はReact Router v7に移植する事を決定しました。
 Rimix Blog “Merging Remix and React Router” より
React Router v7について
React Router v7を新規プロジェクトで使うには、フレームワーク(開発環境)として使う方法と、従来のようにライブラリーとして使う2つがあります。 → 参照
フレームワークとして使う場合は、以下の機能があります(DeepL翻訳に加筆)
- Viteバンドラーと開発サーバーの統合
- モジュール単位のホットリロード
- コード分割(動的インポート)
- 型安全性を備えたルート規約
- ファイルシステムまたは設定ベースのルーティング
- 型安全性を考慮したデータロード
- タイプセーフティなアクション
- アクション後のページデータの自動再表示
- SSR、SPA、静的レンダリング戦略
- State更新のキューイングと楽観的UIのためのAPI
- デプロイアダプター
React Router v7を使ってみる
いつもジャンケンアプリ Next.jsのReact Server Componentsを試してみたをTailwind CSSにしたものです。
プロジェクト作成
プロジェクトはnpm create react-router@pre my-react-router-app で作成できます。create-next-appのような選択肢は無く、プロジェクトには以下が含まれています
- TypeScript
- Tailwind CSS
- Vite
- React 18.3.1 !!
- React Router 7
ディレクトリー構造は以下のようです(一部省略)。dockerでも実行できるようですが、今回はnpmインストールして使いました。
├── Dockerfile
├── app
│   ├── app.css
│   ├── components             ■
│   │   ├── JyankenBox.tsx     ■
│   │   └── ScoreBox.tsx       ■
│   ├── libs                   ■
│   │   ├── JyankenActions.ts  ■
│   │   └── JyankenTypes.ts    ■
│   ├── root.tsx
│   ├── routes
│   │   └── home.tsx           □
│   └── routes.ts
├── package-lock.json
├── package.json
├── prisma
│   └── ...
├── public
│   └── ...
├── react-router.config.ts
├── tailwind.config.ts
├── tsconfig.json
└── vite.config.ts
- ■ 追加ファイル・ディレクトリー 、 □ 変更ファイル
コード
home.tsx
- ①
<head>に入るページのメタ情報を設定する関数 - ②
loaderはRemixのデータ取得関数で、バックエンドで実行されます- ここで
getScores関数を呼出し、その戻り値を戻しています
- ここで
- ③
actionはRemixのデータ更新関数で、バックエンドで実行されます- 引数にはクライアントから色々な情報が渡ってきます。ここではFormDataがクライアントから渡ってきます
- FormData内のhumanキーの値を取り出し、数値に変換し
doPon関数に渡しています
- ④ メインのコンポーネントです
loaderで取得した値がloaderData引数に入っています
import type { Route } from "./+types/home";
import { Te } from "~/libs/JyankenTypes";
import { doPon, getScores } from "~/libs/JyankenActions";
import JyankenBox from "~/components/JyankenBox";
import ScoreBox from "~/components/ScoreBox";

export function meta({}: Route.MetaArgs) {                          // ← ①
  return [
    { title: "ジャンケン React Router App" },
    { name: "description", content: "React Router v7を使ったジャンケン・アプリ" },
  ];
}

export async function loader() {                                    // ← ②
  return await getScores();
}

export async function action({request}: Route.ActionArgs) {         // ← ③
  const formData = await request.formData();
  const human = Number(formData.get("human")) as Te;
  await doPon(human);
}

export default function Home({loaderData}: Route.ComponentProps) {  // ← ④
  const scores = loaderData;

  return (
    <div className="md:ml-8">
      <h1 className="my-4 ml-4 text-3xl font-bold">じゃんけん ポン!</h1>
      <div className="p-3 md:p-6 bg-white md:w-3/5">
        <JyankenBox />
        <ScoreBox scores={scores} />
      </div>
    </div>
  );
}
JyankenActions.ts
サーバーで実行される関数で、Prisma ORMを使いsqlite3データベースの操作を行っています。
- ①
SELECT * FROM Scores ORDER BY id DESCを実行し、テーブルから全対戦結果を取得しています - ② ジャンケンを行い、
INSERT INTO Scores(human, computer, judgment) VALUES(?, ?, ?)を実行し対戦結果をテーブルに挿入しています
import { PrismaClient } from '@prisma/client';
import { ScoreType, Te } from './JyankenTypes';

const prisma = new PrismaClient();

export const getScores =  async (): Promise<ScoreType[]> => {           // ← ①
  const scores = await prisma.scores.findMany({orderBy: {id: 'desc'}});
  return scores as ScoreType[];
}

export const doPon = async (human: Te) => {                             // ← ②
  const computer = Math.floor(Math.random() * 3) as Te;
  const judgment = (computer - human + 3) % 3 as Te;
  const score: ScoreType = {human, computer, judgment};
  await prisma.scores.create({ data: score });
}
JyankenBox.tsx
ジャンケン・ボタンのコンポーネントです。
RemixはReact界のRuby on Railsか? の際にはなかったuseSubmit APIが追加されたので使ってみました。
- ① ジャンケン・ボタンが押されたさいの処理です
- FormDataを作成しhumanキーにボタンの値を設定し
- その値を
submit関数に渡し、サーバー側の関数を呼び出しています
import { useSubmit } from "react-router";
import { Te } from "~/libs/JyankenTypes";

export default function JyankenBox () {
  const submit = useSubmit();

  const pon = (human: Te) => {                    // ← ①
    const formData = new FormData();
    formData.append("human", String(human));
    submit(formData, { method: 'post' });
  }

  const buttonClass =
   "text-white text-center text-sm rounded w-16 px-2 py-2 bg-blue-600 hover:bg-blue-700 shadow shadow-gray-800/50  :bg-blue-700";

  return (
    <div className="w-[230px] mx-auto flex mb-10">
      <button type="button" onClick={() => pon(Te.Guu)} className={buttonClass}>
        グー
      </button>
      <button type="button" onClick={() => pon(Te.Choki)} className={`${buttonClass} mx-5`}>
        チョキ
      </button>
      <button type="button" onClick={() => pon(Te.Paa)} className={buttonClass}>
        パー
      </button>
    </div>
  );
}
JyankenTypes.ts
ジャンケンで使われる型です
- ① Teはジャンケンの手の型で、かつ
Te.Guuはグーの値を表します - ② Judgmentはジャンケンの対戦結果の型で、かつ
Judgment.Drawは引き分けの値を表します
export const Te = {
  Guu: 0,
  Choki: 1,
  Paa: 2
} as const;

export type Te = (typeof Te)[keyof typeof Te];

const Judgment = {
  Draw: 0,
  Win: 1,
  Lose: 2
} as const;

export type Judgment = (typeof Judgment)[keyof typeof Judgment];

export type ScoreType = {
  human: Te;
  computer: Te;
  judgment: Judgment;
};
ScoreBox.tsx
対戦結果を表示する普通のReactコンポーネントですので、説明は省略します。
import { ScoreType } from "~/libs/JyankenTypes";

const JudgmentColor = ["text-[#000]", "text-[#2979ff]", "text-[#ff1744]"];

type ScoreBoxProps = {
  scores: ScoreType[];
}
export default function ScoreBox ({scores}: ScoreBoxProps)  {
  const header=["人間", "コンピュータ", "結果"];

  return (
    <table className="w-full text-sm text-left text-gray-500 ">
      <thead className="bg-slate-200 border-r border-l border-b   ">
        <tr>
          {header.map((title, ix) => (
            <th key={ix} scope="col" className="px-3 md:px-6 py-3">
              {title}
            </th>
          ))}
        </tr>
      </thead>
      <tbody className="bg-white border-b border-r border-l">
        {scores.map((score, ix) => (
          <ScoreListItem key={ix} score={score} />
        ))}
      </tbody>
    </table>
  );
}

type ScoreListItemProps = {
  score: ScoreType;
};
function ScoreListItem({score}: ScoreListItemProps) {
  const teString = ["グー", "チョキ", "パー"];
  const judgmentString = ["引き分け", "勝ち", "負け"];
  const tdClass = `px-3 md:px-6 py-4 ${JudgmentColor[score.judgment]}`;

  return (
    <tr className="bg-white border-b">
      <td className={tdClass}>{teString[score.human]}</td>
      <td className={tdClass}>{teString[score.computer]}</td>
      <td className={tdClass}>{judgmentString[score.judgment]}</td>
    </tr>
  );
};
まとめ
Remixのコードは、Next.jsのServer Functions(Server Actions)と同じように書けますが、
Remixはloader/actionなどサーバー側の関数を呼出せる場所が決まっているのはコードが書きやすい気がします。また、Next.jsではデータベースを更新したあとでrevalidatePath関数を呼び出さないといけませんでしたが、Remixでは自動的に再表示されます。
さらに、いろいな記事を読むとRemixでは Loader → Component → Action → Loader → ...の流れが効率良くなるように実装されているようです。

現在ReactのフレームワークではNext.js一強ですが、これでライバルのRemixが復活・発展して行くことが、Reactのエコシステムには良い影響があると思います。


